Dragon Valley, the place where Umenus Prime, the ancient golden dragon, and Seona, the Spider Queen, faithful servants of Dragon Lord Jurtan, fought during the Dragon War. During the war Umenus, as powerful as he is, breathed out flames, strong enough to melt mountains, to destroy its enemies accidentally hit Seona thus meeting her end. Before she breathed her last Seona shouted, “Pitiful mortals. Your hope ends here and your meaningless existence with it!”
After the war, the mountains where the proud dragon once stood has been cleansed by the Nastal Clan and made it its homeland. All but one area, Seona’s Cliff leaving the land still corrupted with malice and despair for a thousand years.
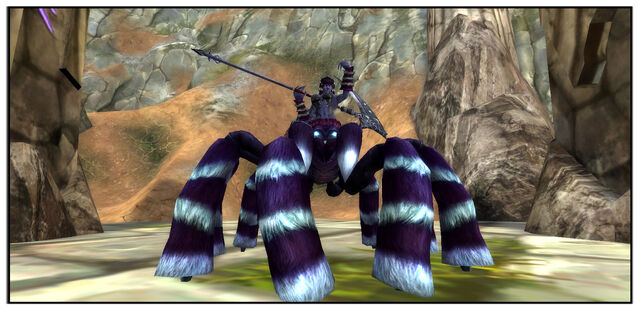
Deep within the cliff lays a forest so dense, so corrupted even the sunlight dares not to lay its rays unto it. A place where off springs and direct descendants of the ancient horror exists. Araknes, followers of Seona, originally came from the Nastal Clan but because of the Spider Queen’s curse they were transformed into hideous entities that resemble horror herself.
At the center of the forest stands an ancient gateway to an alternate dimension where the Spider Queen resides, mustering her strength until such a time when she regains her vitality and once again return to turn the world into eternal damnation. This is true malice, this is Seona Spawning Grounds.
Map

Seona Spawning Ground Map
Quests
1. Promise for Shedding Blood (for Level 25)
- Quest Giver: Cowrak
- Location: Dungeon Entrance
- Objective: Kill Brainwashed Mystic Priests, Gishu Zombie Priests, Polluted Mystic Warriors and Seona Guards
- Rewards: Trace of Ezulan Pandora (Level 25)
2. Promise on Blood (for Level 30)
- Quest Giver: Cowrak
- Location: Dungeon Entrance
- Objective: Defeat Seoron, Seia, Gishu and Seona
- Rewards: Experience and Reined Life Potion (Level 30-40) or Refined Mana Potion (Level 30-40)
Boss Strategies
Seia
Seia has one trick to her which is called Bursting Flames which is a ground-based AOE damage with initial damage per second, considering that the elemental-type of the attack is fire.
From her spot, characters with high health points must first engage the boss as diversion while ranged characters will engage on hitting and performing ranged attacks. Always look-out for the Bursting Flames skill because it usually pops-out near the ranged characters. Sufficient potions and perfect timing is needed to kill this first boss.
The fight is easy if you pay attention to the Bursting Flames skill and also look out for its minions.

Seia
Seoron
Seoron has the same trait as Seia although they differ in the kind of skill used. Seoron uses Spew Poison skill that affects 3 characters if clustered together.
Melee units with high health points must be the first ones to charge so as to keep Seoron busy while the rest of the party attacks from the rear. He focuses more on the players that attack him in melee. Also beware of his minions, they don’t look like much but they kick hard.

Seoron
Garbash
Garbash has strong melee damage and a tough armor that makes him hard to go down. He also has buff skills wherein it increases his minimum and maximum damage, movement speed, and physical and property protection making him almost invulnerable to all kinds of attacks. One of his range attacks is named Lightning of Judgment, pictured as charging his spear while coating it with lightning energy then hurls at a target dealing pure damage, regardless of your armor or property protection.
One way of taking this monster down is to make use of traps and AOE spells. Using traps like binding traps on top of cold energy traps while other characters constantly damage Garbash with their high-damage skills. Traps have high hostility rate meaning there’s a greater chance that the monster will keep an eye for you. Characters with such skills have no choice but to run in circles so as to prevent the monster from getting too far from its original position.
After the traps are used make sure that you place a new one so as to halt the monster’s movement and ability to cast buff spells and damage spells. Constant stun will help defeat Garbash instantly. Note: Garbash is not the only monster in the area so make sure you kill the minions first before charging straight to the boss.

Garbash
Gishu
Gishu specializes in long range attacks, since he’s a warlock, and devastating spells that can leave the expedition party falling to its knees. His damage spell is called Blizzard, it’s an AOE spell that can hit 6 characters at once and has cold damage making you temporarily slow. His buff skill is Protective Coating which adds physical and property protection unto him. Next is the Gaze of Hades that targets an attacker. Gishu casts silence to his enemies making them unable to perform well in combat. This boss monster is of no joke so unless you want to wake up the next morning you will take this one seriously.
On taking up Gishu, characters that have high health points are, obviously, in the front line although must me supported by healers or ranged damagers. Evasion is of almost no effect on Gishu considering that his attacks never miss.
As soon as reaching his position, annihilate first his minions before engaging him head-on. His minions may not cast spells but they can do serious damage if left alone. Applying stun skills and continuous damage (e.g. incinerate, flame trap, poison, etc.) to Gishu will temporarily weaken him but if taken for granted may turn the scenario from advantage to failure. Gishu focuses more on characters with the highest damage so be sure that you get everyone’s back in this one. When his health point halves or lower, Gishu cast a spell, Guard Summon, wherein a dozen miniature version of him will be summoned as an aid. With powers almost the same as the summoner, this makes Gishu a worthy adversary.
With his summons in the field, AOE spells are of great help to quickly hasten the death of these “mini-me’s” so always check on your party member’s health point.

Gishu
Largo
Largo represents Seona’s high wall, sturdy but deadly. He focuses more on powerful melee attacks, not to mention his passive stuns that leave any adventurer to his fate. His only skill, named Going Berserk, adds up his minimum and maximum damage, and movement speed making him easier to move around while dealing heavy damage. His other passive skill, Reverse Sword, decreases minimum and maximum damage to one character and also his critical chance thus weakening anyone that got hit.
First thing that one must do is place traps, binding and cold energy to temporarily halt his movements, and then range players must continue on firing while Largo’s immobilized. Once he gain movement, immediately stun him again then place armor decrease buffs in him to make him vulnerable for a short time because Largo has the highest defense on Seona’s minions. Use that time to hasten your attacks but watch out for his stuns. Make sure that you constantly check your health point and also the other mobs to prevent from dying constantly while in battle.
A good timing is the key on taking this colossus down to earth.

Largo
Seona
Your quest is almost at its finale, as you walk past the corpse of her champion, Seona the horror that has hunted Dragon Valley for time immemorial is now in front of you, waiting on her meal to be devoured before leaving the separated dimension to be once again spread terror and malice upon Magic Earth. This is your only chance to stop her from bringing the plague, are you ready?
“The world will know that free men stood against a tyrant, that few stood against many, and before this battle was over, even an immortal can bleed.”
Okay so this is the last stop before leaving the dungeon. Seona is a balanced final boss because she specializes in both melee and range attacks. Her melee attacks using her defiled claws corrupted with malice slices down enemies like knife through butter so be extra careful when engaging her head-on. She cast ranged skills such as Spider Venom, an AOE attack that focuses on one target but damages its surroundings as well. Then there’s also Steel Spider Silk which immobilizes her target while she delivers heavy attacks. Her melee attacks also comes with her Special Attack in which she pounces on a target character delivering heavier blows equals to larger damage.
Avoiding direct contact with Seona is one way of keeping you alive. She usually targets characters that give the biggest damage from her, one that’s nearest and also one that has the lowest health (but this rarely happens). Placing traps around her while range characters deal damage from afar, melee damagers must do their best to make Seona focus only to them.
There are times when stuns no longer take effect on Seona so choose the right timing on using such skills so as to not waste it. As soon as Seona’s health point drops lower than half, four towers will automatically appear behind her, summoning dozens of spider lings. These spider lings may deal very minimal damage but they attack very fast so make sure that you eliminate each one of them first before continuing on to Seona. Make sure to keep your potions in check, might as well your colleagues so as to prevent a lot of casualties.
And as the tyrant lay on the ground, Seona the Spider Queen, feared by men and beast alike held her last breath cursing the world as it slowly makes everything around her turn black. Like falling into the abyss of time, slowly gave up her will into nothingness and disappear silently.
This ends your conquest on Seona’s Spawning Ground.